With almost 10,000 mi. of travel experience, am I still happy with the Transit's performance as a RV chassis? Yes.
I have not yet weighed our rig when loaded in our usual travel configuration--clothing and personal items, food, camping gear, etc. The Smart car that we pretty much always have in tow weighs about 1,900#. The most challenging route we have encountered so far is several trips over Raton Pass between CO and NM. Raton has a 6% grade at 7,800' elevation. I can maintain the 55 mph speed limit either direction. I have not tried Vail Pass yet (7%, 10,666'), but I expect that would slow us down. The 3.7L Transit V6 revs freely and the 6-speed transmission shifts as needed, so I have no concern being able to handle most any driving situation. Also, going up steep mountain grades is a small portion of our travels anyway. We once owned a Minnie Winnie Class C that had a Dodge big block (400 c.i.) V8 that barely pulled the same grades at 30 mph in low gear, and not towing anything.
As far as gas mileage, that has been pretty consistent at 12.5 loaded, towing car, and running A/C. I have not driven much unloaded (no towing, no A/C), but when I do, the ScanGauge and dash computer both indicate 14-15 mpg consistently.
Monday, October 16, 2017
Monday, October 9, 2017
15 - Maxx Fan & Water Filter
I have also mentioned the omission of a high volume fan like a Fantastic or Maxx fan in the Orion. I had a Fantastic fan in our last Class B, and it was fine. I opted this time for the Maxx fan only because I liked the dual support arms vs. the Fantastic single arm. Probably not that big a deal. I got the most basic manual model just as we had before and it serves our purpose well; mainly, to exhaust air at good volume with multiple speeds from whisper to jet.

Not having a ladder (prior to installation detailed in previous post), and being concerned about running a power supply wire, I engaged a mobile RV technician to help. It was an expensive choice (3 hours charged labor), but I just wasn't confident for this task. The job was pretty straightforward; remove the manual center vent and clean up, run a 12v supply wire, and install and caulk the new fan. Running the 12v wire was the time eater. The Orion has aluminum spar rafters with solid foam between them, the ceiling, and the roof deck material. We opted to get the power from the rear vent bath fan. One spar was immediately to the front of the bath fan, so a hole was drilled in it. A wire probe pushed from the center vent through the foam to the rear didn't hit anything until it hit the rear vent spar, or so we thought. It would have seemed reasonable to push a wire from the rear vent through the drilled hole and aim for the center vent, but that wasn't possible because of interference of the rear wall. So it was a matter of pushing the probe from the center vent and try to hit the drilled hole. It was finally located and the wire pair was pulled through. Connections were made to the rear fan supply and the Maxx fan installation was completed.
This installation was definitely worth it. We have spent many comfortable nights sleeping in warmer weather by turning the fan on to a lower speed and only opening the vent over the bed which brings the cool night air right in on us. Also shown in the picture is the full-length mirror I installed on the bathroom door.
We like to have a water filter for drinking water and coffee and tea. I found a Culligan kit which included a faucet, cartridge filter, connection adapter, and water lines. I drilled a hole through the counter at the right rear of the sink and mounted the faucet. I disconnected the cold supply hose at the faucet and installed the adapter tee, then reconnected the supply hose. I put a reinforcing board behind the panel under the sink and mounted the filter bracket to that. Connecting the lines to the filter, faucet, and adapter was just a matter of cutting to fit and push into the respective connector sockets. I like this filter because it only takes a quarter twist to remove or install it. We never buy bottled water because the filter makes all water we have encountered taste just fine. I use the basic carbon filters, but you can get higher filtration types. Same in our houses.

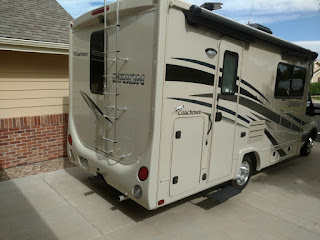
14 - Rear Ladder
The Orion 24RB does not come with a rear roof ladder, which is probably a cost-cutting decision since so many of Coachmen's other models include them as standard. Most of my previous RV's had ladders, and I find that I often want to get up on the roof for inspection or maintenance work; especially when I am travelling and do not have access to a regular ladder. Therefore, installing a ladder on my Orion was on my "to do" list.
I wanted a black single piece ladder but it so happened that Amazon had an unbeatable price on a chrome-color jointed ladder, so that's the one I opted for. Now the instructions say, and I am well aware, that the ladder mounts need to be screwed into solid material to support the weight. Thinking about the lightweight "Azdel" construction of the Orion, I was pretty sure that solid backing was not likely, and more so given the relatively limited mounting location options.
So, I spent a lovely (and full) day planning, measuring, cutting, and fitting to get it right. Once I had everything fit and assembled, I drilled the holes for all the mounts. At each mount point, I scuffed the surface of the Azdel, mixed and applied some 3,300 psi marine epoxy, and screwed each mount into place. I was right about having no solid material to drill into, only the thin ply of Azdel and backing material. But with 32 screws and about 15 square inches of epoxy bonded contact, it seems to be more than strong enough.

13 - Side Table & Add'l Shelf
There is quite a bit of space between the front end of the couch and the driver's seat. The floor of that space turns out to be a pretty good place for our cat's litter box. Adding a "table" over the space helps hide the litter box some as well as give some extra surface to set things on.

I found the shelf at IKEA. The size was just right so I didn't have to do much sawing to fit, and the color is a pretty good match to the rest of the decor. I mounted the shelf/table to the wall using a "L" bracket underneath. The table sits on the end panel of the couch held in place with double-side tape.
There was enough shelf material left over to make a small corner shelf for use from the rear side of the bed. Now the person on that side has a place to put their glasses or book at night. It is mounted with glue and a couple of small "L" brackets on the top that aren't easily seen from below.

12 - Remount Main TV
I previously posted how the main front TV was mounted so low that the "eye" for the remote control was below the line of sight to control the TV while seated. I had to hold the remote up near the bottom of the bed to operate the TV. So, a remount was necessary. I unplugged the TV from the outlet in the right side compartment and then unscrewed 4 mounting screws that were accessible on either side behind the TV. These screws were through a mounting board and into the front wall panel. The TV is pretty light, so I was able to hold it to disconnect the A/V and antenna cables and pull the power cord through and free, and lay the TV aside.
Next, I measured the length of the mounting board attached to the back of the TV and marked two vertical reference lines with masking tape on the front wall panel to the outside of the centered width of the board. I cut two lengths of 2x4 stud lumber to a sufficient length from the joint where the front panel angles back to another panel and down below the original mounting holes. These are spacers to move the TV closer to the front edge of the ledge it sits on as well as raise it a bit. Since all this material is out of sight behind the TV, precision and appearance are not critical. If you stand close at either side of the TV, you can just see the mounting. For that reason, I painted the edges of the mounting board and spacers black.
I glued and screwed the spacers to the forward panel using the tape reference lines to locate them. In preparation to remount the TV, I first installed a 10 inch HDMI extender cable into one of the spare ports on the back of the TV. I previously discovered that the way the TV was mounted, it was impossible to get my hand behind it to plug in an auxiliary HDMI device. The extender cable socket is now accessible at the left side of the TV.
Remounting the TV was a reversal of the removal steps. Route the power cable back to the right compartment, reconnect the A/V and antenna cables, and then position the TV by centering the mounting board in front of the newly installed spacers. Then I drove the original mounting screws through the original mount board holes into the spacers. The spacers added enough distance so the TV sits on the ledge near its front edge with the remote "eye" well exposed to any angle of view. One added detail in the pre-mount sequence was to put a couple of short strips of thin foam insulating tape on the bottom edge of the TV so it wouldn't make contact noise while sitting on the ledge. They don't show from the front. Now I can operate the TV without having to stand up, and I can easily plug in my laptop or Roku via HDMI cable.

Saturday, September 23, 2017
11 - Solar Cover, Windshield Tint, Shelf
This is a post of some of the first of several additions or fixes I have made to "Phrynie," our Orion. (Aside...Our RVs acquire names. This Orion is named Phrynie and our Smart toad car is named Dot. If anyone has watched "Miss Fisher's Murder Mysteries" on TV, you will understand where those names came from.)
1. Solar screen windshield cover. I took Phrynie to Arizona RV Parts Center, aka SunPro Manufacturing, in Wellton AZ to have a solar cover made. I had purchased two of their covers previously for our two former motorhomes, a class A and a class B. Their screen is an excellent product and the ones I got were made to order from stock patterns. However, they had not made a cover for a Transit so Phrynie was their first Transit unit. I got a great discount plus some extras because they were able to create a pattern from my unit to be able to use for future stock orders. I use it whenever we are stationary for more than a couple of days. You cannot see in during the day but can see out well and it really cuts the sun heat. It also is a decent window screen when lowering the side windows.

The SunPro cover mounts using corner pockets at the top rear edge of each door, strong magnets at the bottom, and a strap through the mirror arms. It also comes with the wiper covers, the wipers also helping to hold the cover in place. SunPro also made pockets like these for my original solid vinyl Orion windshield cover, which has made it much more resistant to slipping or blowing off.

2. Windshield tint. I felt right from the start that the Transit windshield came up too high and directly over me. So I had a local window tint installer put a tint band across the top of the windshield. It is actually two bands either side of the dark expansion matrix behind the camera monitor and about the same distance down. It seems just right and really cuts glare and heat.

3. Sofa shelf. There is a fairly big gap behind the sofa, and our cat was more than willing to go down behind and get herself stuck under the sofa. And stuff like blankets and pillows easily slipped down. So I mounted a 1x4 finished board as a shelf using a couple of brackets. I tried to mount it using the sofa side panels, but as the picture shows, the panels are different height and the shelf slanted. So I just mounted the low end bracket to the wall to level the shelf. Nothing shows when the sofa is up, and things (and cats) don't slip down.

Sunday, September 3, 2017
10 - Extended Camping Experience
Since it's been a while since my last report, I can now relate some extended use experience with the Orion. In April '17, we traveled 1,200 miles from Yuma AZ to Parker CO. This was a transfer trip between houses towing the Smart car and loaded with extra food, household items, clothing, and tools that we move. We spent five nights in the RV of which one was dry camping in chilly Albuquerque. We were very comfortable driving, living, and sleeping in the RV and all systems worked well. The only problem we encountered was that we plugged both of our phones into the dual USB outlet by the couch. In the night, we woke up to that burning electrical smell. I traced it to the USB outlet which was very hot. I don't know if it would have caught on fire, but the unit seems to be defective. I can still get current out of either socket when I plug a phone in, but the outlet gets warm after a few minutes. I probably could have had it replaced under warranty, but I got a different USB unit with a built in voltmeter from Amazon for $15. I haven't installed it, so I have yet to see if I have a working USB power source. There are USB outlets in the pull-up power outlet between the range-top and sink, but these only work when plugged into 110v electric. The one by the couch is 12v supply and works while dry camping.
We took a 3-week 2,900 mile trip from CO via Saskatchewan to Edmonton and Calgary, Alberta, and back in June and July. Eleven nights were in commercial campgrounds, eight nights were in friends' driveways hooked up to 15 amp electric only, and one night was dry camping in a forest campground. It was quite hot and when we didn't have 30 amp service, we ran the generator as necessary to have air conditioning. The Maxx fan I installed proved to be essential for providing air circulation at night when it got cool. By running the fan at a lower speed and opening the vent over the bed, it was very comfortable for sleeping. As I have said, A Fantastic or Maxx fan should be a mandatory factory item. Again, the Orion performed perfectly both for living and driving (Transit part).
In August, we took a 1,000 mile trip to Nebraska for eclipse viewing. One night dry camping, five nights on 15 amp electric at relatives and friends, and one night on 30 amp. Again hot, again using generator and a/c as needed plus use of Maxx fan. We were comfortable.
General observations: The Transit chassis with standard 3.7L gas engine is great in my opinion. Very comfortable to drive for longer periods. Reasonably quiet. It performs just fine with our load and towing the Smart. Mileage has been pretty steady at 12.5, all with towing the car and usually running air conditioning. I had hoped to get a little better, but the size and output of this engine dictates that it has to work harder and at more revs than a bigger displacement V8 or V10. I usually drive at 62-63 mph and that is about 2200 rpm. The transmission shifts down readily at any grade but the RV maintains speed on almost any slope except maybe a 7% uphill at 9000 ft altitude. I have no complaints about performance. The transmission tow mode works well and holds speed in check on long downgrades. I have a little aprehension when making these trips because neither the Orion nor the Smart has a spare tire. I have a road service policy on both, but that would be of little comfort in the middle of Montana miles from anywhere and no cell phone service. I guess I will just continue to hope for the best, use quality tires and maintain them. There really is no practical place to carry a spare tire on either vehicle. I drove 40k miles on our previous Class A without a spare, and most every big Class A out there doesn't have a spare either, so we takes our chances I guess.
The coach part is meeting all our needs. We are more convinced that this is the perfect size RV for us now. I have made some more improvements and fixed a few minor problems that I will relate later. Tank capacity is good. With our usage, the fresh water lasts about four days, We have done five days on the holding tanks and they weren't full then, so I don't know how many more days they would serve. We might be good for a week with conservation, but the fresh water supply seems to be the limiter. As for comfort, quality, and practicality, we are pleased with our Orion.
Wednesday, April 12, 2017
9 - Privacy Cover and Curtain
My Orion came with a very nice vinyl exterior windshield cover. It fits over the windshield and side windows and is held on with embedded magnets. This was intended to be the privacy cover for the cab, as no interior shade or curtain was provided. Three problems became quickly evident. (1) You had to go outside to install the cover, which would not be pleasant if raining or stormy. (2) If you wanted privacy in the daytime, the cover made it very dark inside. (3) The magnets barely held the cover in place and it would blow asunder in any stiff breeze. Time to engineer a solution.
Being in a hurry for our second camping run, I found a couple of bath towels that looked good and together were the right size for an interior curtain. I had some punch-through snaps and eyelets from an old project and installed 8 of them them along one side of the towels which also served to fasten them together for the right length. I fastened 4 S-hooks to the middle 4 eyelets which I hang to the existing sun visor hardware. I put 2 cup hooks above the top rear of each side door to hook the remaining eyelets to. The result is a curtain that covers the front glass but still leaves room to access the cab area. The towels we chose are a bit heavy but still let light filter through and give a bit of insulating value. I should have run them through 3 or 4 more wash cycles though, as I still get a bit of lint every time I handle the curtain. Between uses, I just fold it up and stuff it between the driver's seat and the couch. It only takes a few seconds.


Being in a hurry for our second camping run, I found a couple of bath towels that looked good and together were the right size for an interior curtain. I had some punch-through snaps and eyelets from an old project and installed 8 of them them along one side of the towels which also served to fasten them together for the right length. I fastened 4 S-hooks to the middle 4 eyelets which I hang to the existing sun visor hardware. I put 2 cup hooks above the top rear of each side door to hook the remaining eyelets to. The result is a curtain that covers the front glass but still leaves room to access the cab area. The towels we chose are a bit heavy but still let light filter through and give a bit of insulating value. I should have run them through 3 or 4 more wash cycles though, as I still get a bit of lint every time I handle the curtain. Between uses, I just fold it up and stuff it between the driver's seat and the couch. It only takes a few seconds.
Below - Stock exterior cover

Below - Privacy curtain made from two towels

Below - Arrows point to S-hooks hooked to visor points. Circles are
punch-snaps that fasten the towels together. (Could be sewed, but
don't have sewing machine.)

Below - Right visor hook and rear cup hook attachment.

8 - The Sewer Connector Problem
Back in Post 6, I mentioned that the sewer outlet as installed on the coach was inoperable. The problem is that the outlet was mounted close to the under-belly and behind the lower skirt of the siding molding. There was literally no way to connect a sewer hose coupling to the outlet due to the interference from the skirt. I discovered this as I was trying to empty the tanks after our first trial camp outing. Obviously, a bit of a problem as seen in the picture.

My wife got on the phone to a Forest River representative, but figuring no easy nor quick solution was in the offing, I got in the toad car and drove 20 miles home to get my trusty saber saw, some masking tape, and some files and sandpaper. There was clear space behind the skirt, so I applied masking tape to the outside and traced a pattern of the outside of the hose coupling onto the tape. I then found a bowl in the kitchen that had a diameter slightly larger than the coupling and traced a nice arc in the right position. I caught my breath and then proceeded to carefully saw the semi-circle piece out. I filed and sanded the cut smooth and the result looked pretty much like it was made that way. I was able to empty the tanks.
Meanwhile, my wife had talked to an engineer from F.R. and he basically said he was at a loss to explain what happened. I followed up later with them and sent pictures showing the issue. I don't know if my unit was the only odd one like this, but I suspect the result was that the outlet was run and hung a bit lower to clear the skirt. Actually, I'm kind of glad it is where it is as there is more ground clearance.

Friday, April 7, 2017
7 - 4/2017 Status and Questions Answered
I had a punch list of 4 relatively minor warranty items that I took to RV World in Yuma, AZ. They were very accommodating to do the work even though they are not the selling dealer. Items were: (1) GFCI outlet kept tripping. Replaced with new. (2) Awning LED strip lights not functional. They were never wired to the switch when built. New fused circuit added. (3) Gap at floor between floor and wall--could see ground from inside. Screwed together and sealed. Beautiful repair-can't detect it. (4) Did not get 2nd set of compartment keys. On order. This brought the coach up to full functionality. I have since installed a 2nd battery under the entry step, and put a Maxx-Air fan in the middle vent location. A Maxx-Air or Fantastic Fan is one serious omission on standard equipment in my opinion, considering some of the other standard items included. I would happily exchange the outside TV that I doubt I will use for a powered exhaust fan. I also had the 1-1/4" to 2" hitch adapter permanently welded on since all my hitches and hitch accessories are 2".
I received the following questions in a previous post comment and provide brief answers here.
1. Is this a 4-season coach? The fresh water tank and all plumbing lines are inside and above the floor, so would be in the heated area. The holding tanks are under the floor but have electric heat jackets. Windows are single pane. The drain pipes from the holding tanks to the sewer outlet are fairly long and would be exposed to freezing. So the answer is, sort of but not really.
2. What is the length? Not measured, but 24' + or - a few inches is about right.
3. Spare tire? None included. I believe one could rig up something to fit underneath. Or get a rear carrier installed.
4. Does either cab seat swivel? No. Swivels are available for passenger seat only as after market.
5. Option for heated cab seats? No. Standard commercial Transit chassis with cloth seats.
6. What type windows? Single pane horizontal slide opening for 3 main windows.
7. Refrigerator size? Between 5 and 6 cu. ft.
8. Is the club lounge with barrel chairs still available? There are more Orion models including cab-over plans. My 24RB model is still listed. Drop-down bed with small dinette and 2 club chairs.
9. Does the table require using the leg support? Pretty much yes. The support was added because the wall supports only pulled out of the side panel if too much weight was put on the table. Like some large lady using the table as leverage to get up from the chair at an RV show (many times!)
10. Is the mattress iCool memory foam? No. It is generic 4" thick industrial foam. We added a 2" memory foam pad and cushioned mattress cover on top, and it is very comfortable.
11. Is there a house inverter. No, and no factory option.
12. Convection microwave. No, it's regular microwave, and no factory option.
13. Is a tankless water heater available. No factory option. It's a standard 6-gal DSI tank heater and no electric heater mode.
14. What are the 3 roof vents? Front and mid vents are standard crank-up. Rear bath vent has a 6" noisemaker fan. The front vent is covered when the bed is up against it. I installed a Maxx-Air fan in the mid vent position at my own expense.
15. Type of roof? Rubber membrane over plywood (TPO?)
16. Heat strip in A/C. No, and no factory option. A/C is ceiling ducted, which is a bit of an upgrade.
17. Option for leveling jacks? No. Probably can be done as after market if your budget can handle it.
Sunday, February 26, 2017
6 - Four Months of Orion

(above) First camping experience
Problems:
- Sewer outlet not operable - fixed
- Rear mount broken on drawers by refrig - fixed
- Bath faucet drips into cabinet
- Open gap under couch between floor and wall
- Awning strip lights don't work
- GFCI in bathroom trips
- TV mounted too low for remote to work - fixed
Annoyances:
- Switches by entry door not labeled
- Switch at water entry port not labeled
- No interior privacy curtain provided for cab
- Step to bed not at proper angle; rungs hard on bare feet
- Fresh water tank drain valve not easily accessible
Improvements:
- 1-1/4" to 2" hitch adapter
- Solar windshield outside cover
- Add corner pockets to OEM windshield cover
- Interior privacy curtain for front of cab
- Drinking water filter and faucet on kitchen sink
- 2" memory foam mattress topper + pad
- Narrow board as shelf behind couch to fill gap
I will elaborate on these in successive postings. Problems 1 and 2 required immediate attention, and I fixed them myself. I also fixed Problem 7 by remounting the TV. Problem 3 was causing about a cup of water a day to drip onto the floor inside the bath sink cabinet, requiring a catch bowl. I have an appointment at a Forest River dealer coming up for warranty work on Problems 3-6. Overall, considering the price of an Orion, the number and severity of issues is relatively minor (so far !!). No RV comes out perfect and they all have something that could be better.
Subscribe to:
Posts (Atom)